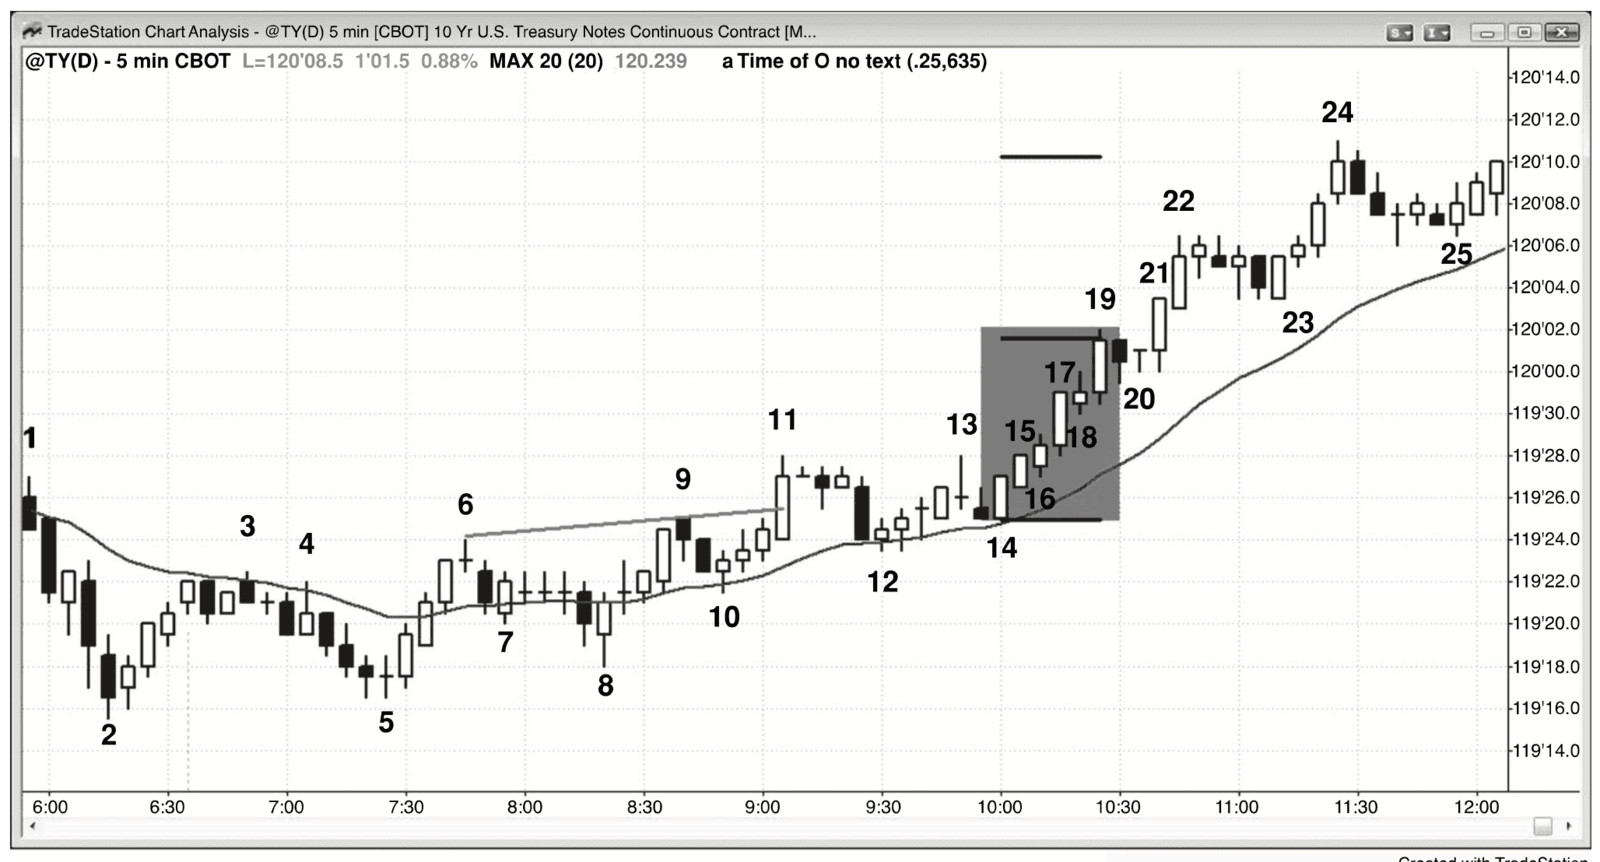
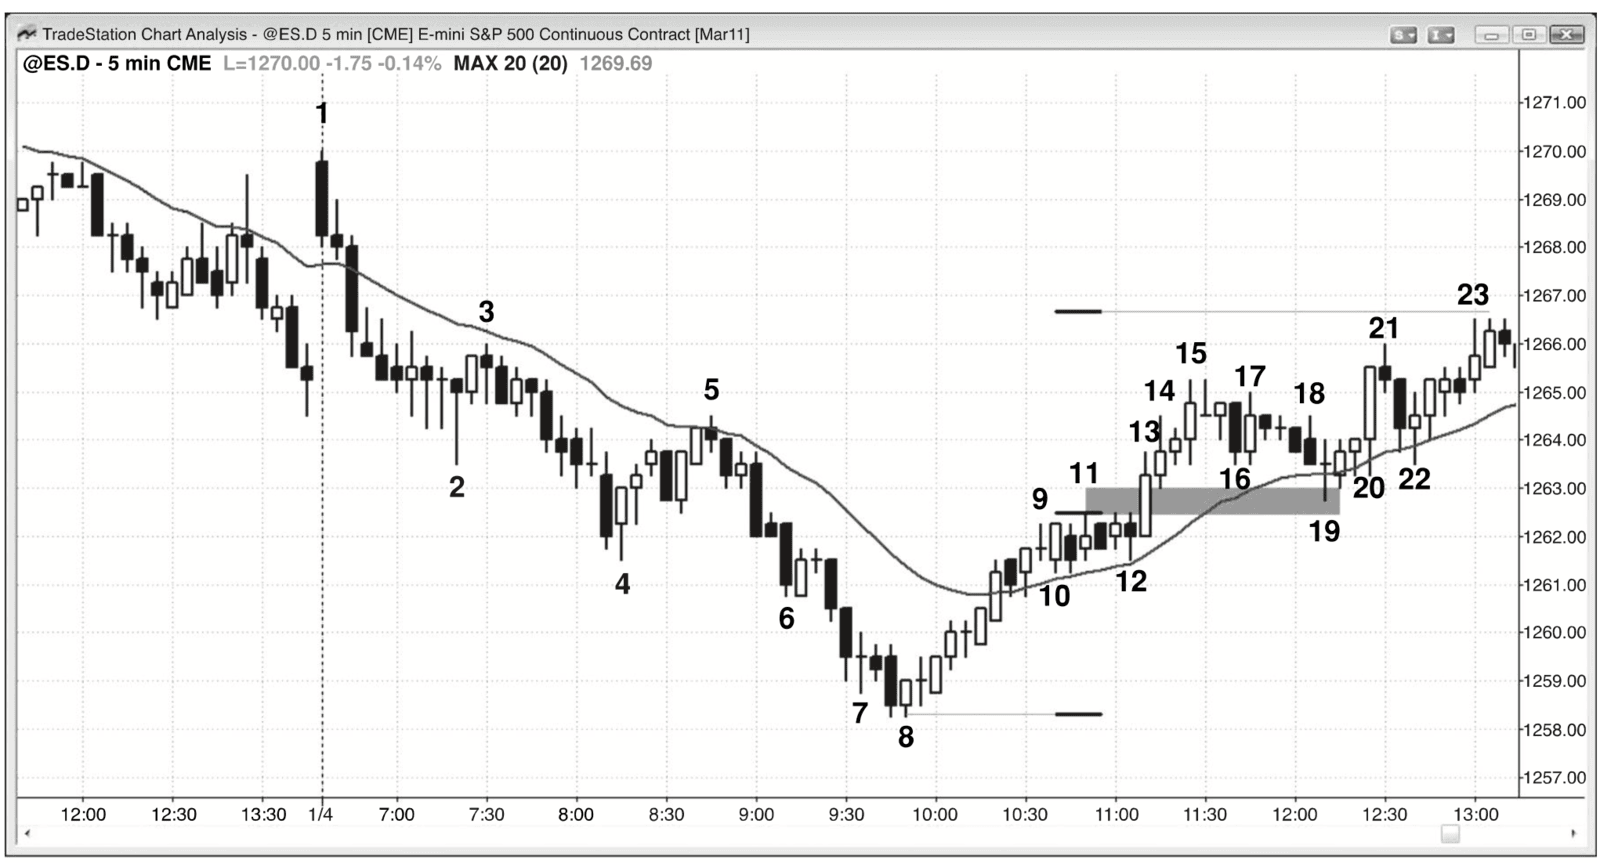
Trên trang nàyChương 1 — Hình minh họa Figure 1.1 — Breakouts Are Reliable Setups Figure 1.2 — Breakout Pullback