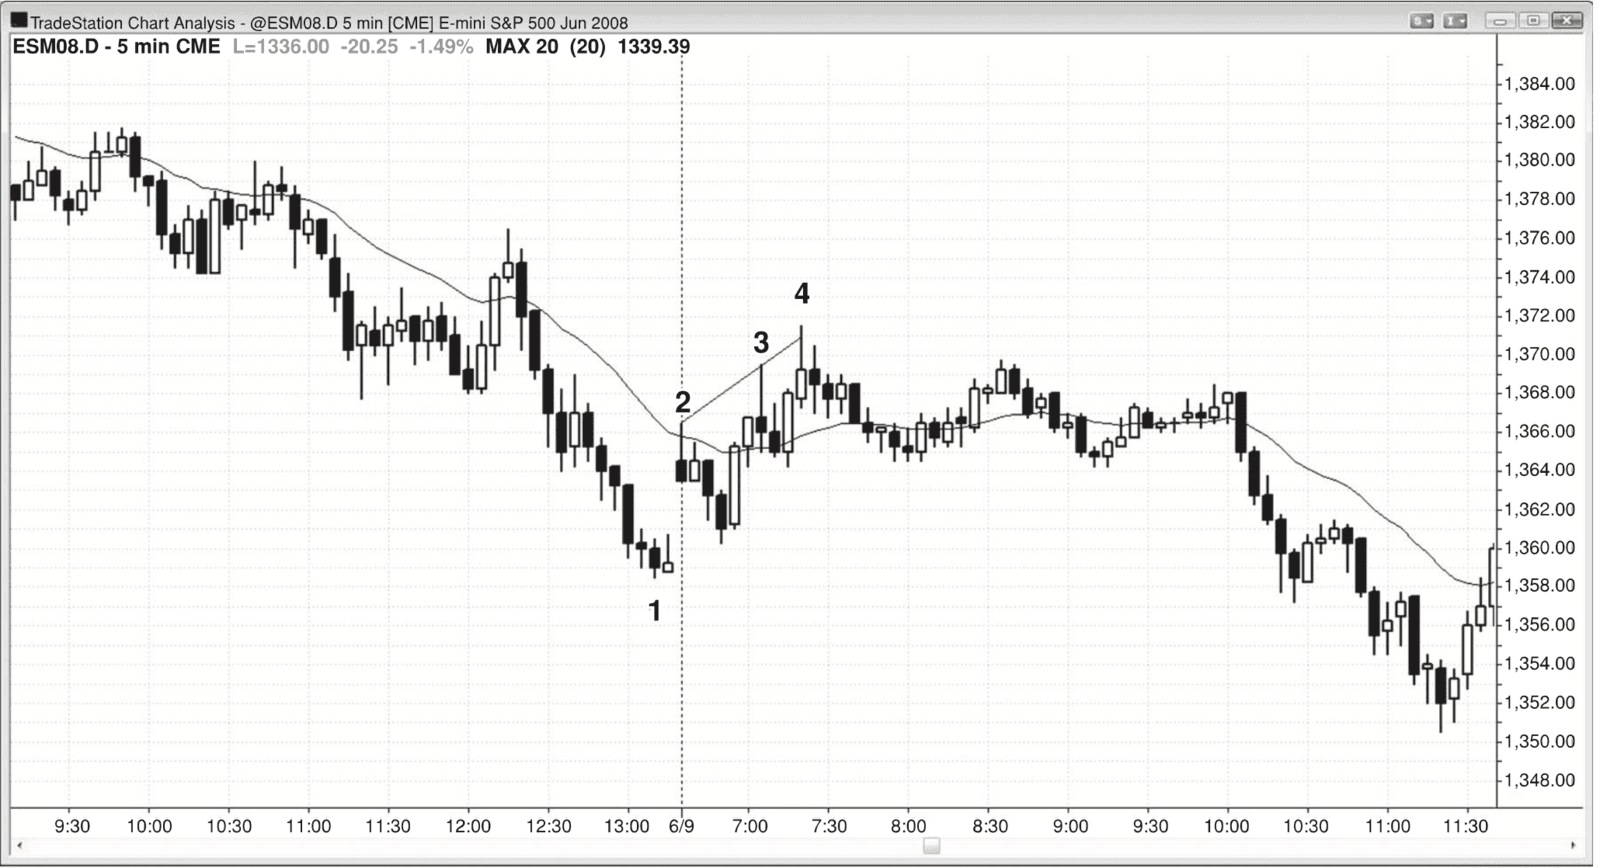
Chương 17 — Hình minh họa
Figure 17.1 — Bar Counting
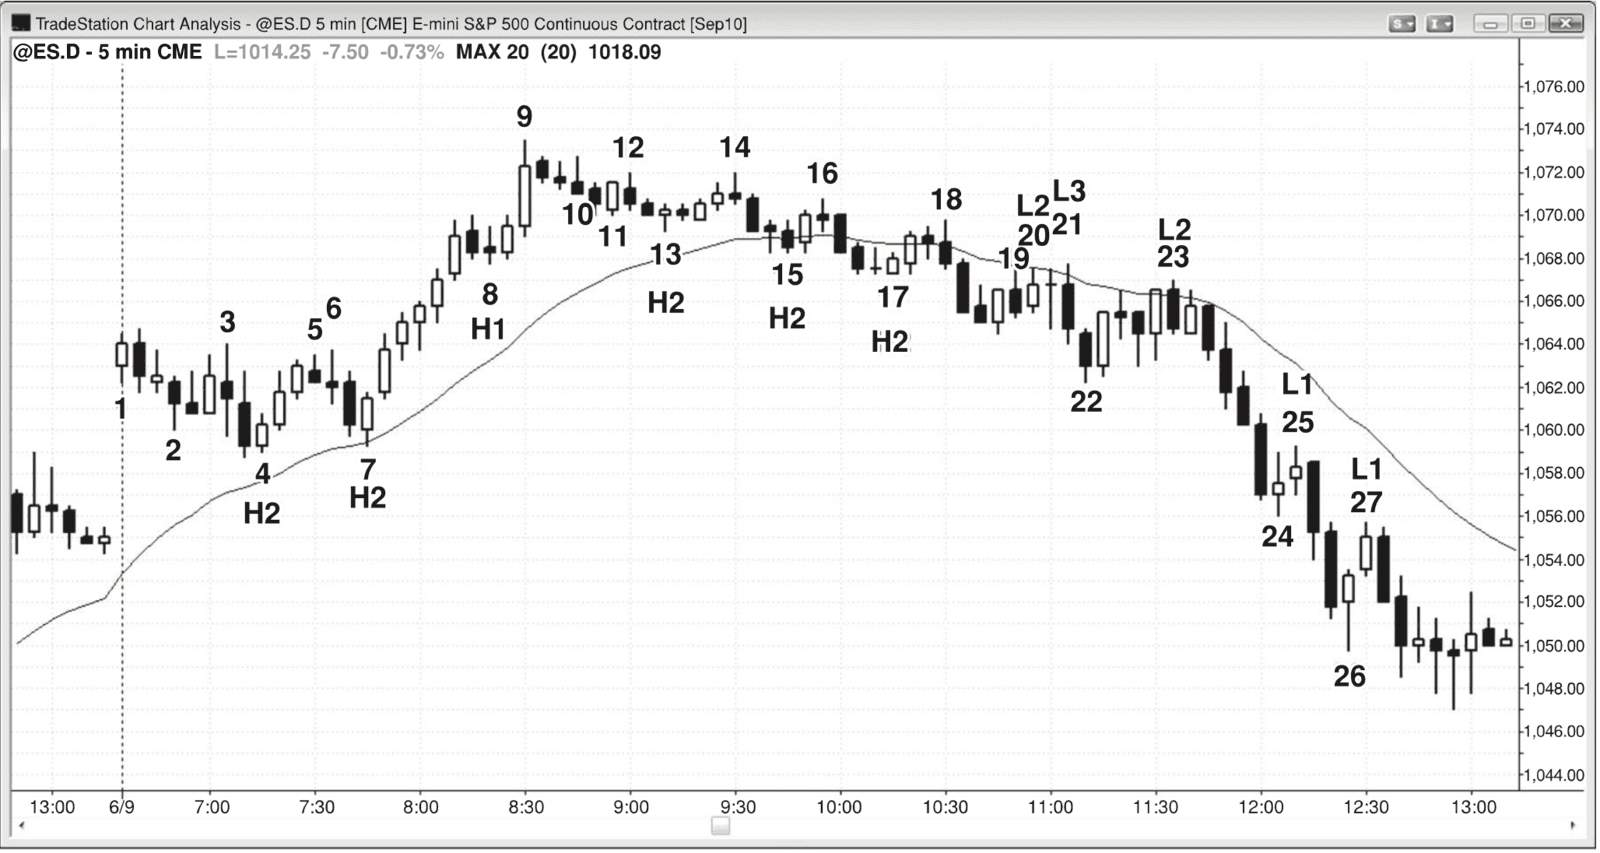
Figure 17.2 — High and Low 1 Setups in Trading Ranges
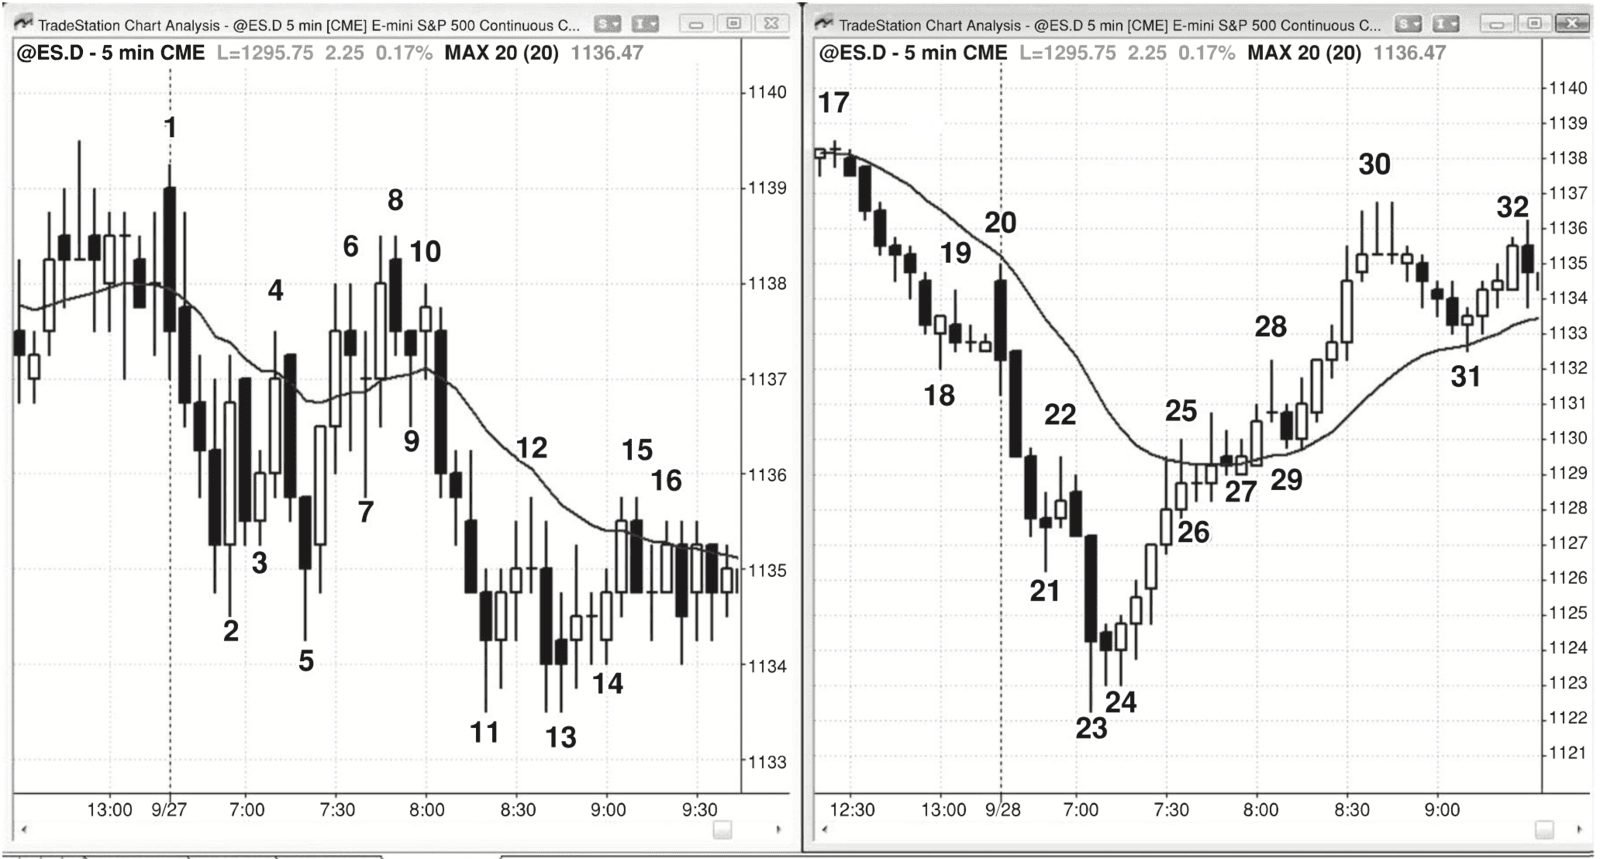
Figure 17.3 — Bar Counting Is Sometimes Difficult
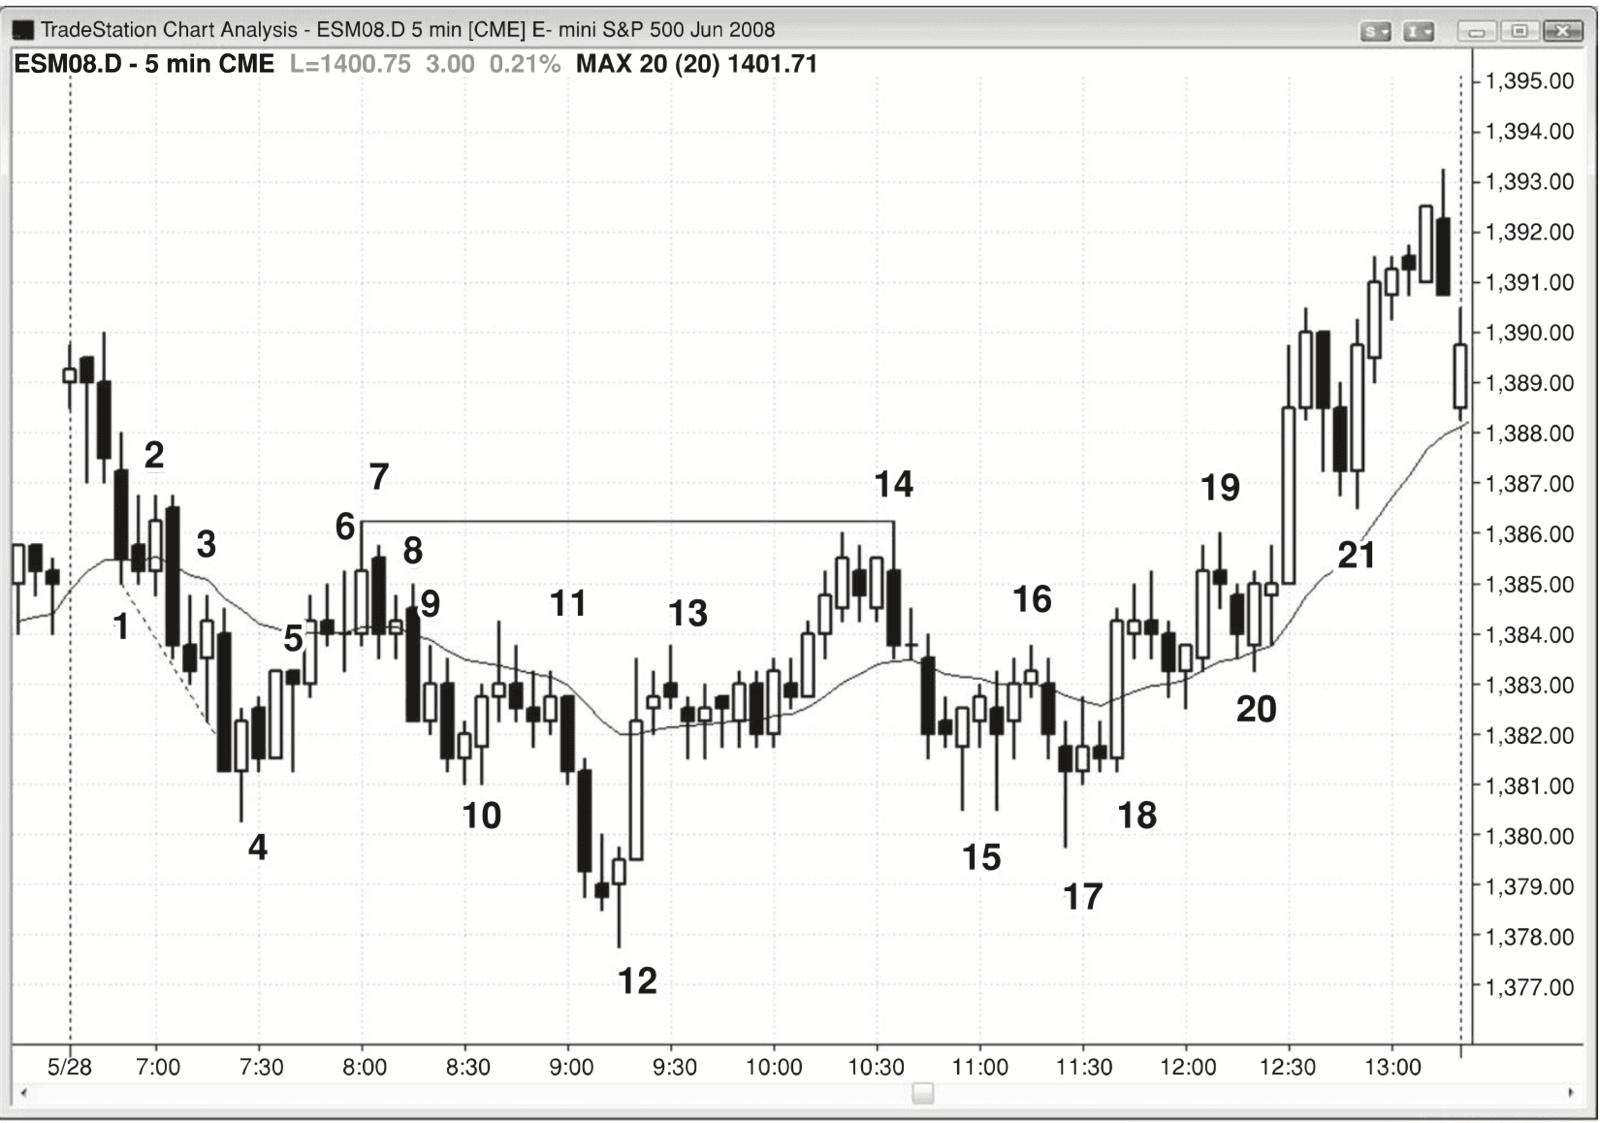
Figure 17.4 — The SDS Is Helpful in Analyzing the SPY
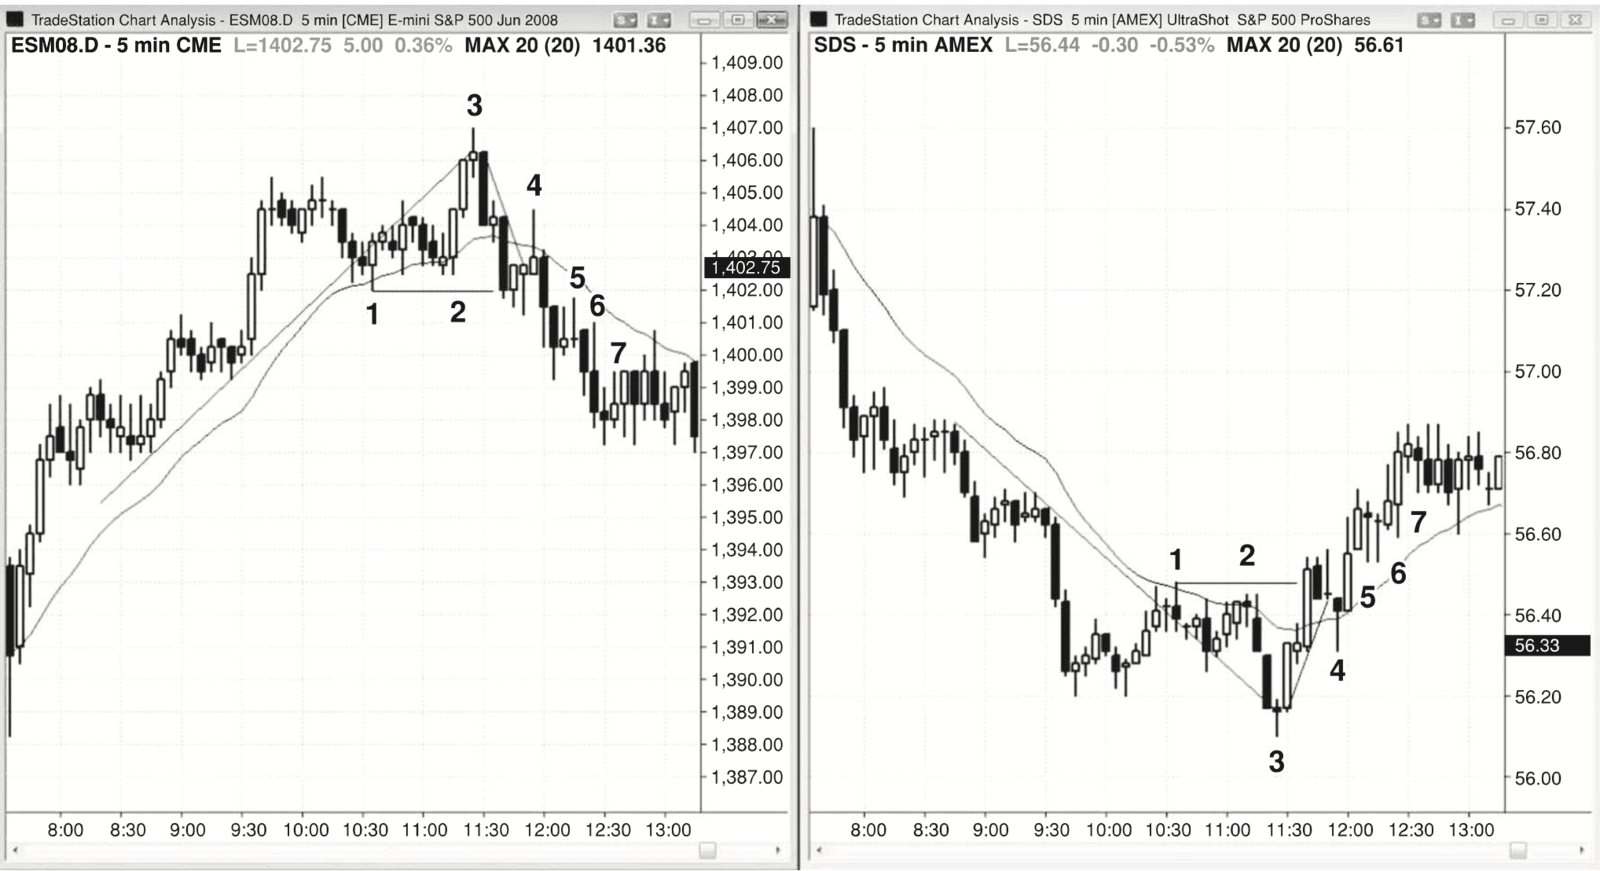
Figure 17.5 — A Failed Low 2 Often Ends Up as a Low 4 Short
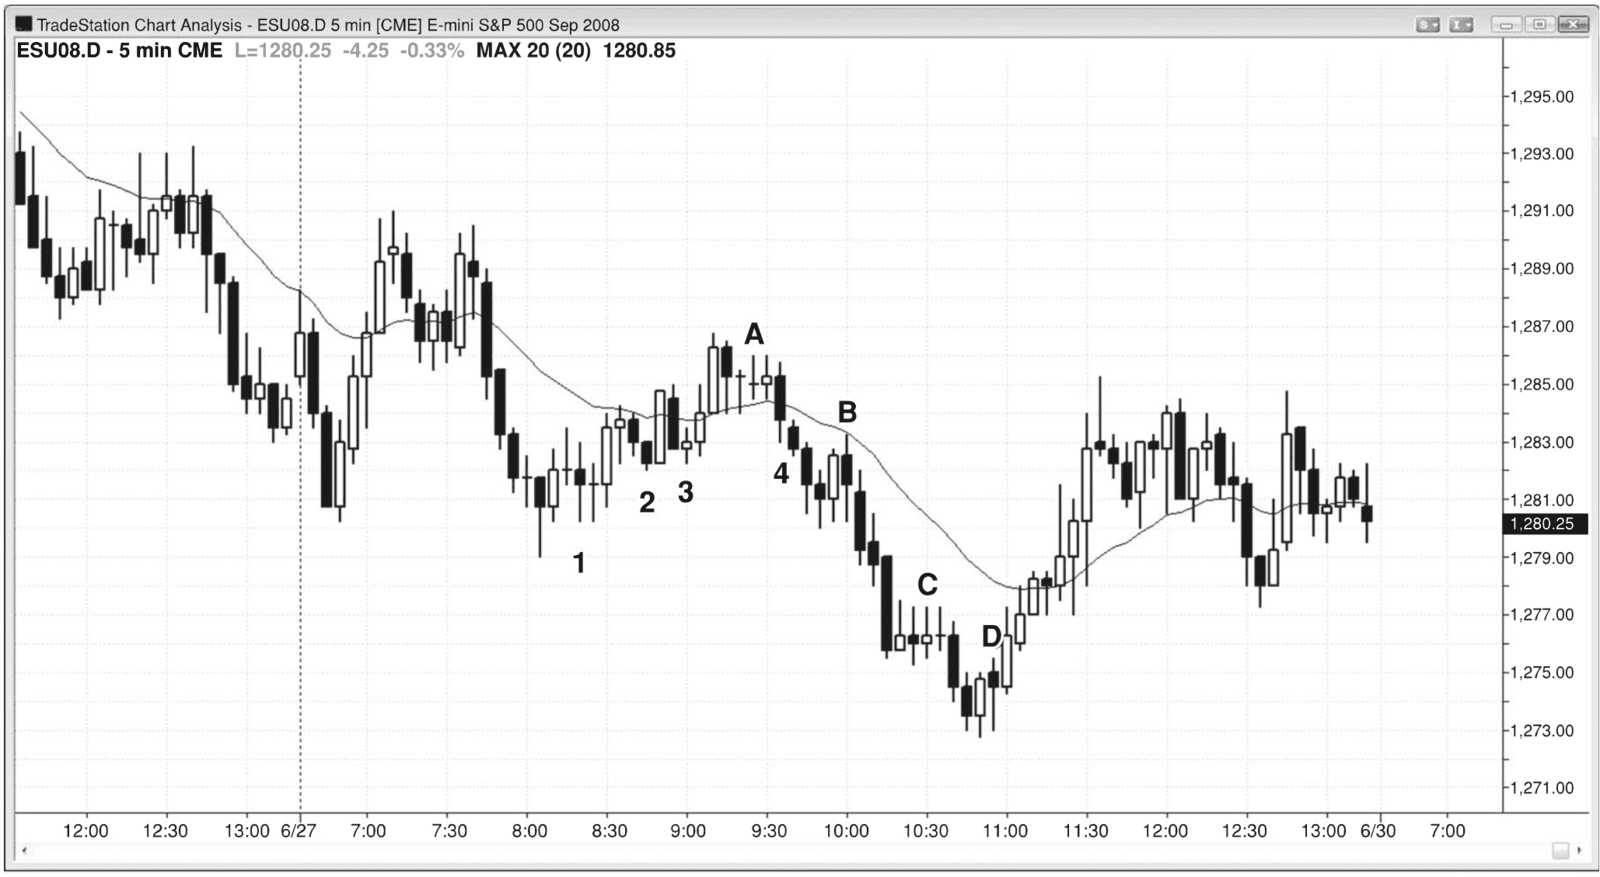
Figure 17.6 — Failed Low 4
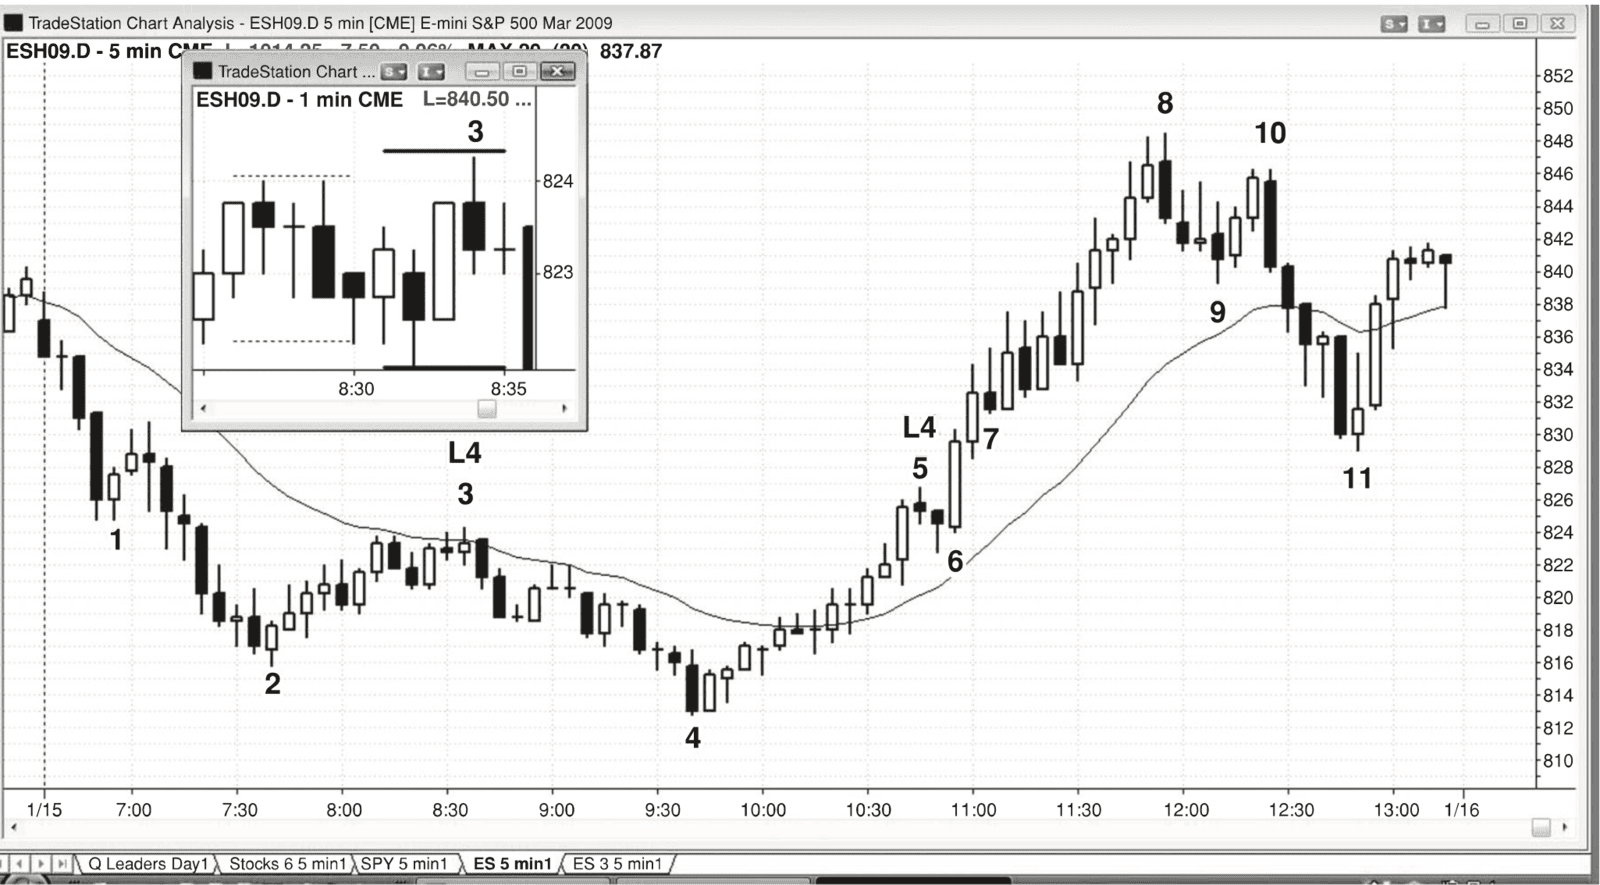
Figure 17.7 — A Low 2 in a Bull Trend Is Not a Short
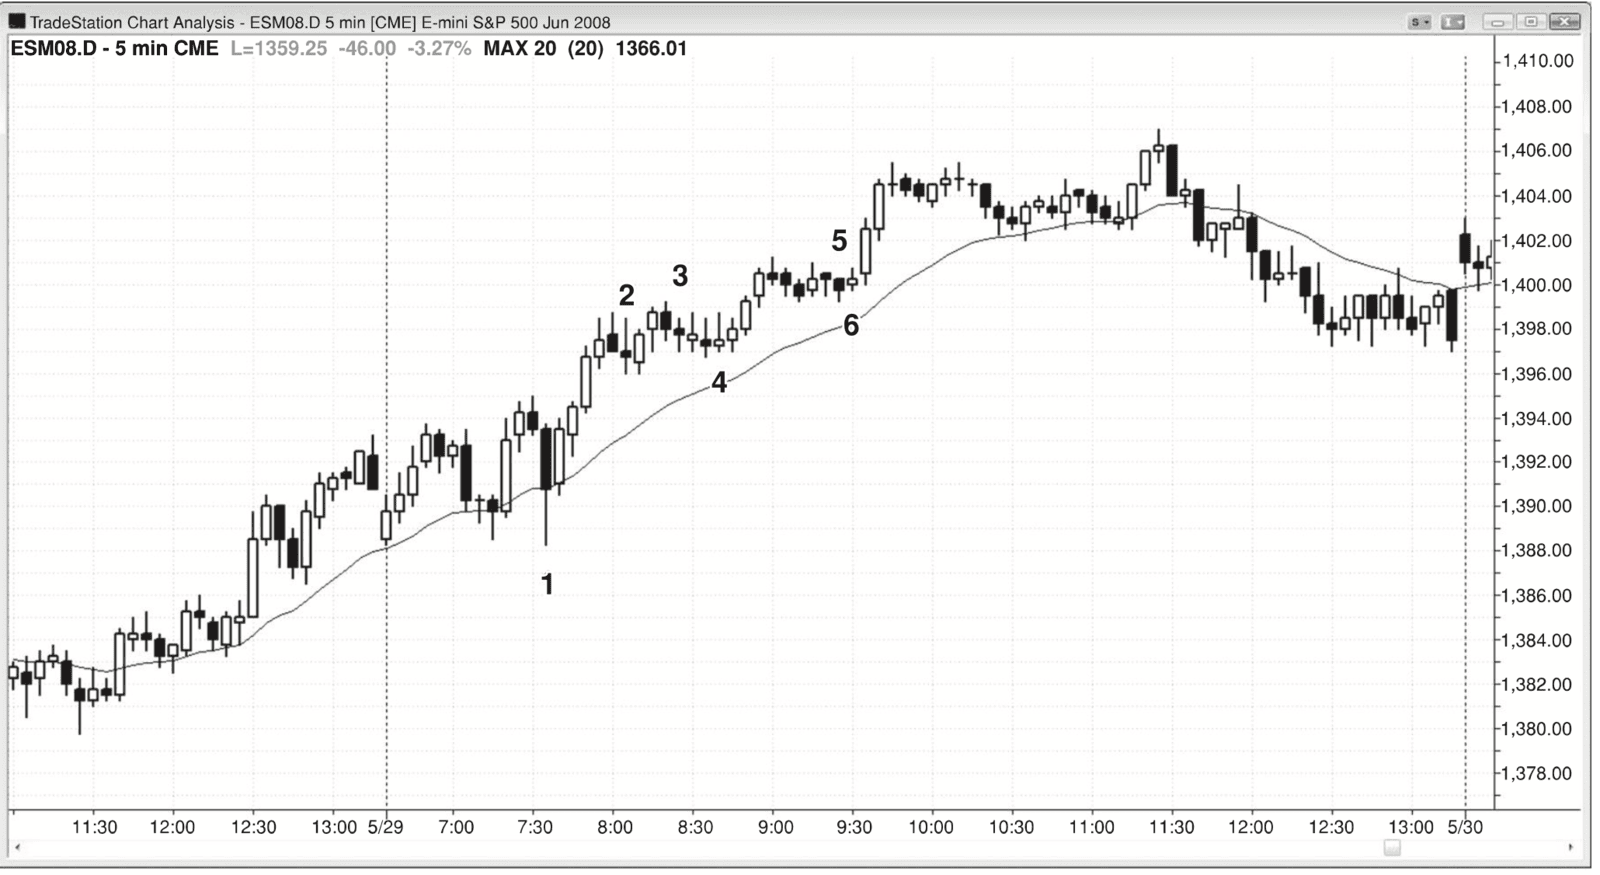
Figure 17.8 — Failed Low 2
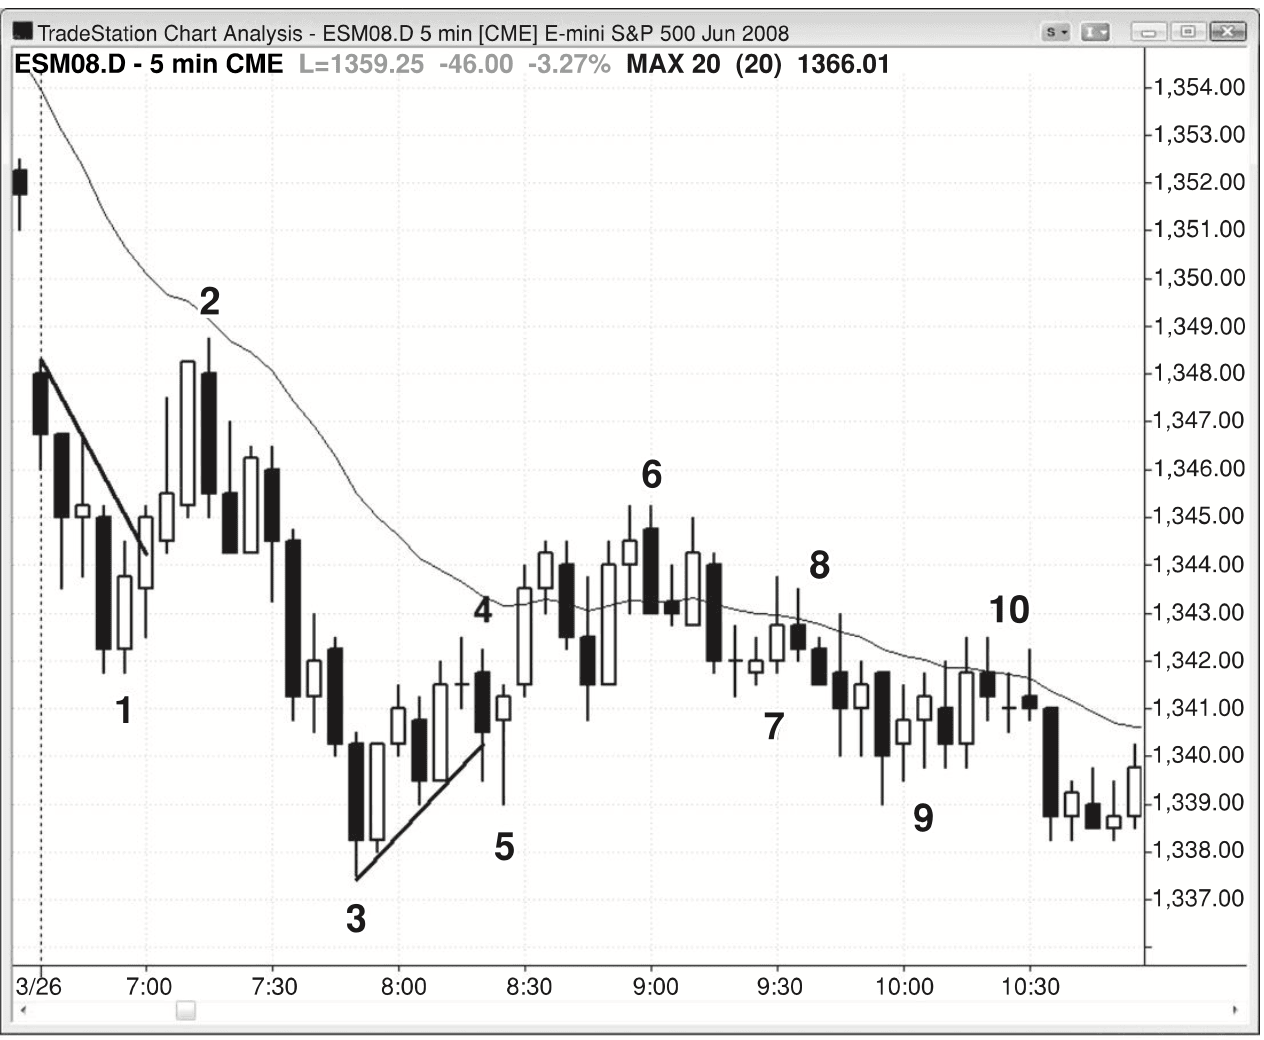
Figure 17.9 — A Failed Low 2 Can Evolve into a Low 3 or Low 4
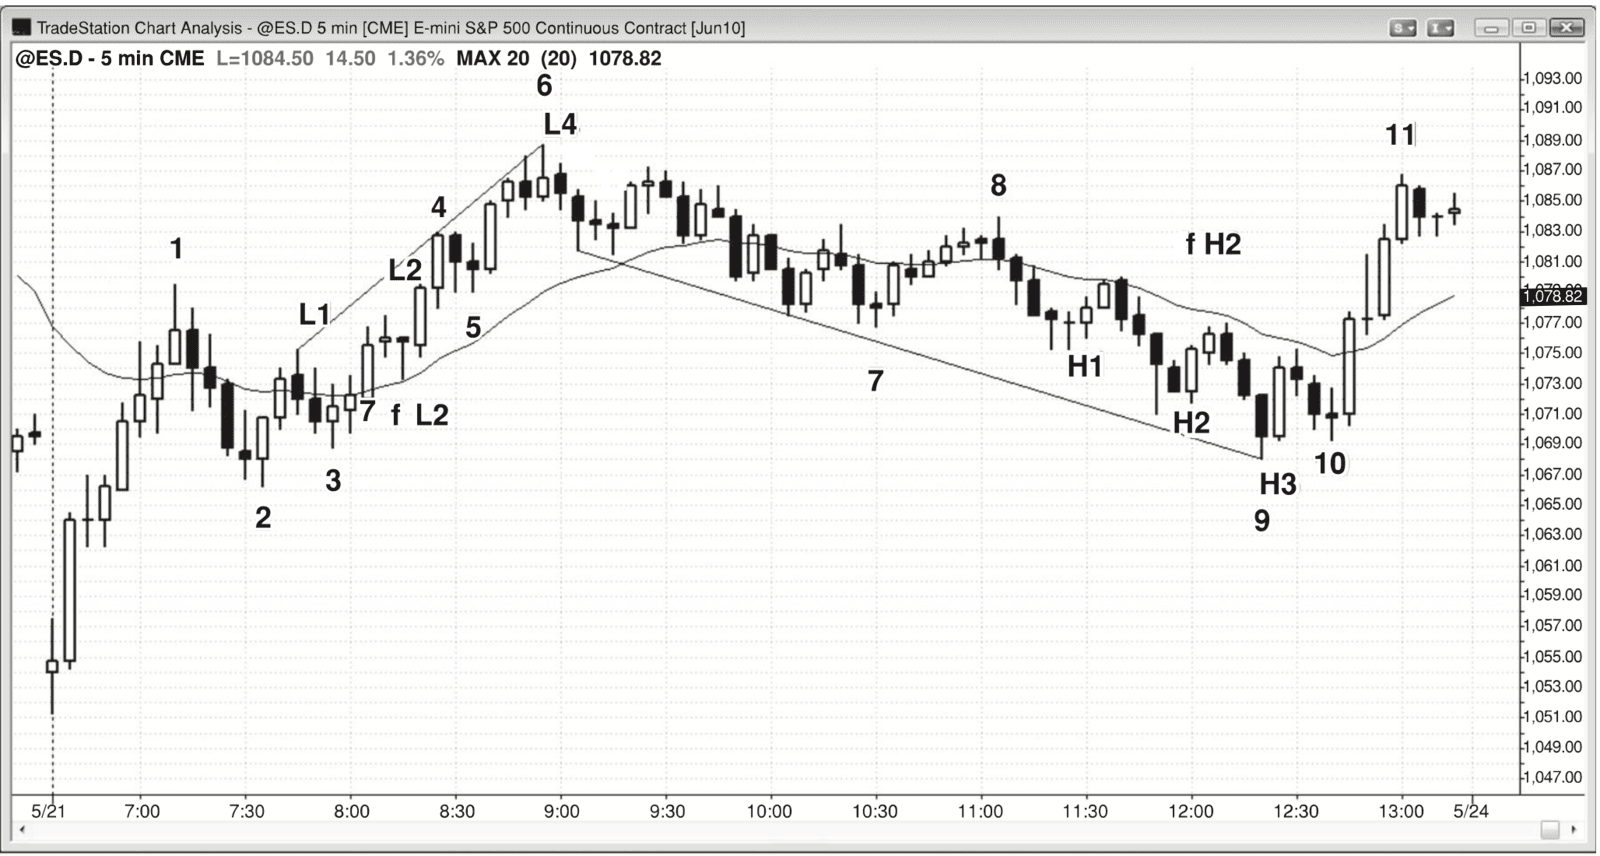
Figure 17.10 — High 2 Variant
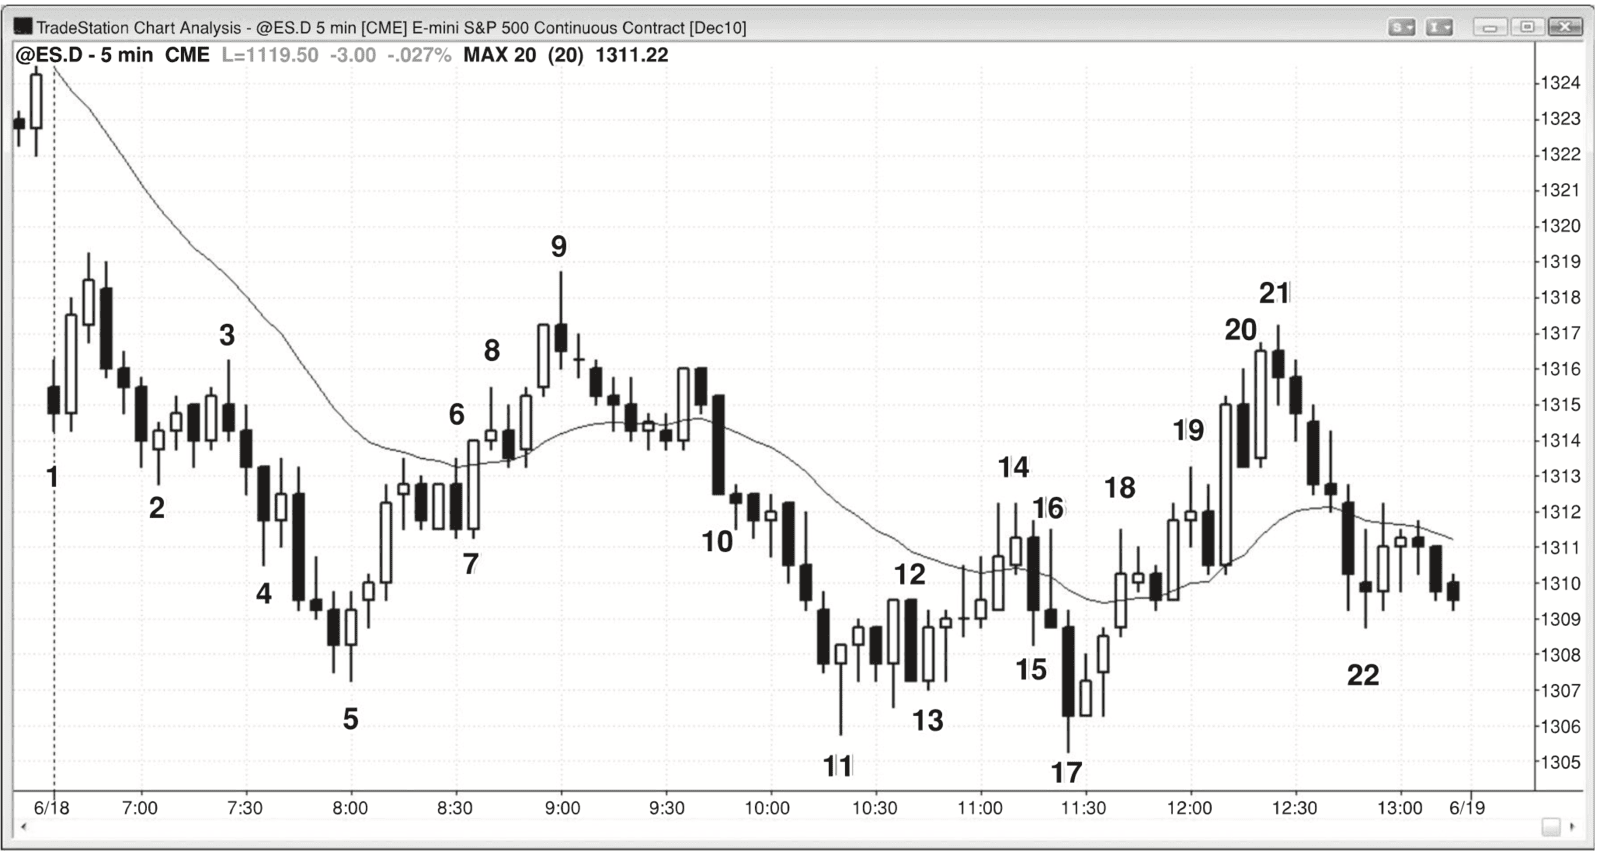
Figure 17.11 — High 2 Variant
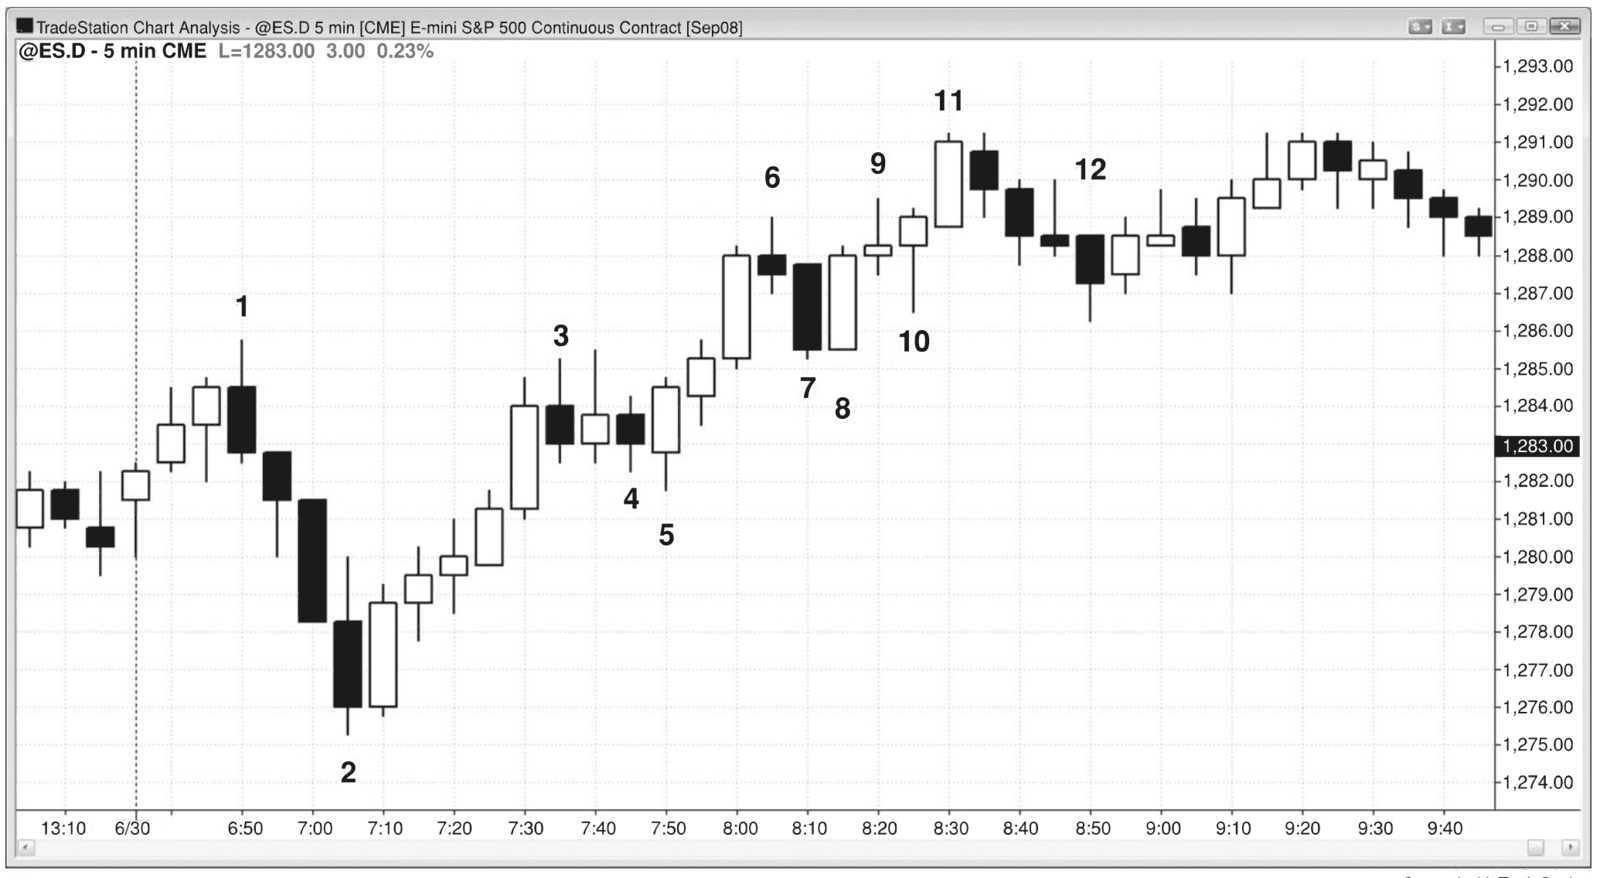
Figure 17.12 — Low 2 Variants
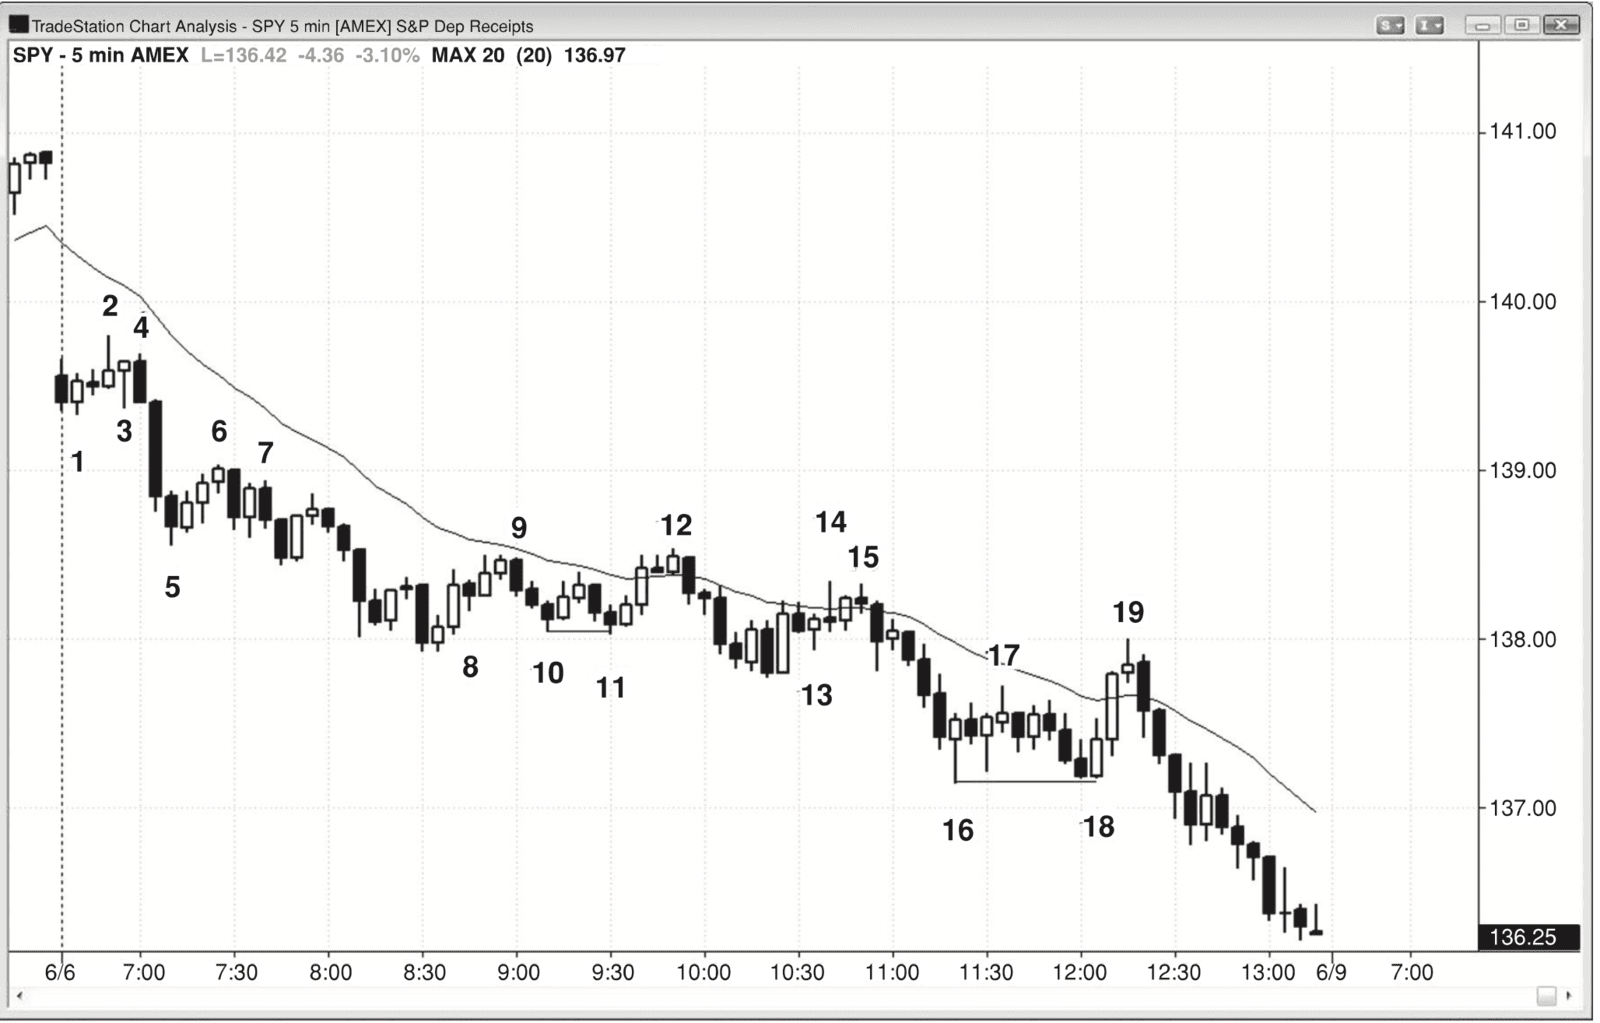
Figure 17.13 — A Spike and Channel Is a Two-Legged Move